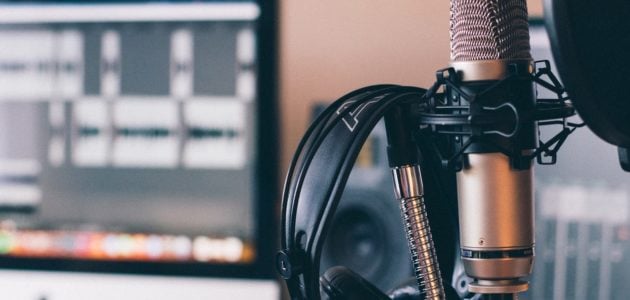
Voice Over Equipment Guide
Today, we are taking a look at everything you need to take your voice-over home studio to the next level. We will take you, step-by-step, through the voice-over equipment you need in order to do professional voice over jobs from the comfort of your own home. This is going to be helpful for voice artists at all levels, and all budgets. So, let’s get started…
Why Actor Should Do Voice Over?
I believe all actors should take a serious look at the voice-over industry. For one, all the core skills you have as an actor are complimentary to voice-over. The fundamental skills you already have as an actor allow you to skip ahead of the cue, and in many cases make you studio ready, without you having to take a single course. You have already spent countless hours working on your voice, and have developed solid skills in text analysis as well as great vocal flexibility and expression (which allows you to bring the emotional side of a voice-over read to life). So, with a fun and lucrative career on the horizon, why not take a deeper look into the voice-over industry?
With home studio setups for voice-over now so affordable, you can also give this career a go, without having to make a massive investment. Let’s take a look at what we need…
Voice Over Home Studio Budget
When putting together this resource page, I felt that there wasn’t much point mucking around with a low budget, medium budget and high budget option for every aspect of the home setup. The exciting thing is that you can get to an industry-standard setup these days without spending a fortune. If you try and cut corners, and go below a certain standard and price point, you may save a few bucks, but really you just end up with something that you can’t use once the jobs start coming in.
So, what I have done is simply offer my main recommendations for voice-over gear that I use, and recommend to my students and friends. I have offered some extra ideas throughout if you wish to take your setup to the next level.
A note on USB microphones…
Before we dive into my recommended home voice-over setup, I want to talk about USB microphones. I get it, these are super easy to use, and a really affordable option. But to put it simply, even a top of the line Rode NT-USB or Blue Yeti, is not good enough. They sound great and are good gear, but no professional job would be comfortable working with you using a USB microphone. Of course, you can do it, and probably would get away with it for some jobs, but if you are on a site where you have to list your gear, you just won’t book the jobs.
Do I Need a Voice Over Home Studio?
Even though I have already outlined that buying an industry-standard voice over studio is no longer an incredibly expensive endeavour, it is still a sizeable expense for most actors. Unfortunately, it is very tough to get work in the modern VO industry without a home studio.
If you are with a top voice over agency, you may still go into studios and record. But this only happens if you are a top voice over who is working for major brands. Most voice actors are working largely from home.
Interestingly, with everything that has happened during the pandemic over the last few years, even the elite voice actors are often working from home. So this trend is only going in one direction.
My Recommended Voice Over Setup
So, this is my recommended voice over studio. I have basically listed the products I love that are the most affordable to get the job done. Then, below, I have listed a more professional setup. But I want to reiterate that this first recommended setup is more than enough, and would allow you to record professional-level voiceovers from home.
#1 What Computer Do I need for Voice Over
Every home studio setup begins with a computer, but actually, this is the step most of us don’t have to worry about. Gone are the days where you had to buy a custom made computer for your audio setup. In the scheme of things, audio editing is now considered fairly easy for computers to handle. I personally have always stayed in the Mac world; even though they are a little more pricey, they do just seem to run smoother, as long as you’ve got a fairly recent model. If you go into a professional studio, chances are they will be running off a Mac. While PCs can lack the smoothness that comes from Mac’s integration of software and hardware, they are far more afforable in terms of hardware for your money, and they do have a lot of flexibility when it comes to parts and additions. If you’re experienced with playing around with these components, adding in a high quality sound card is a great idea; external audio interfaces like a Focusrite USB, or similar, will add that extra punch to your audio work (see below). Your computer’s performance will largely depend on your computer’s processing speed, regardless of whether you’re working off a Mac or Windows. Of course, getting the most up to date computer will help your system run faster, but the computer you already have is likely to be totally fine.
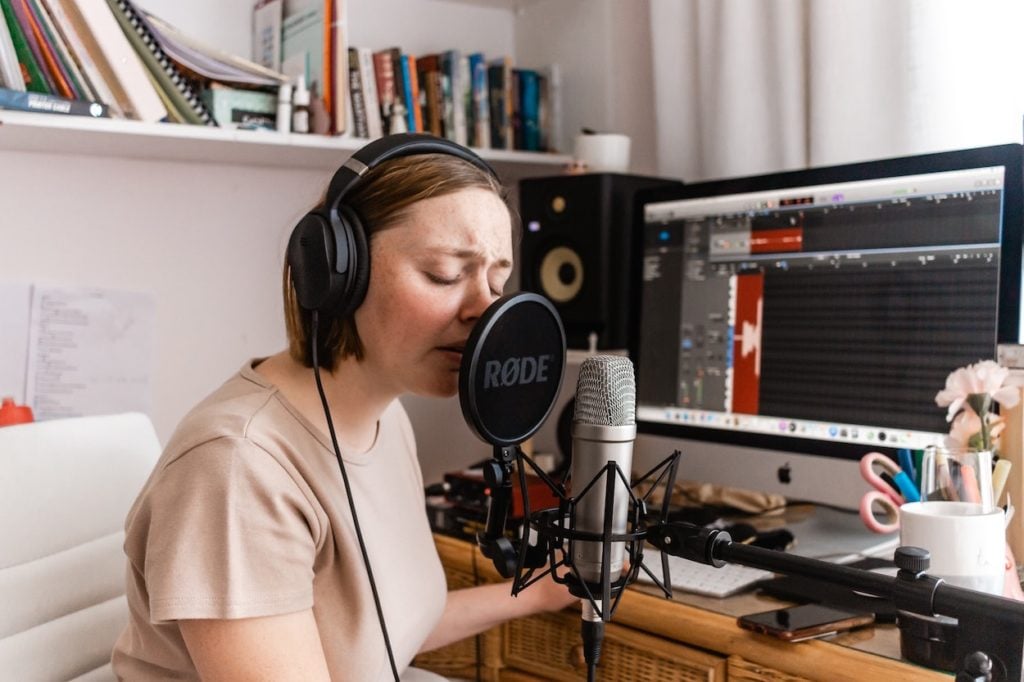
#2 Best Voice Over Microphone
My recommendation – Rode NT1
The Rode NT1 is a fantastic microphone. Rode is one of the most well-respected brands in audio. They are so solid they offer a 10-year warranty on virtually all their products, which is insane. I own the Rode NT1 and cannot recommend it highly enough. It’s one of the quietest microphones with just 4.5dB of self-noise. If you are new to VO, background noise is the enemy, so having a microphone that is super clean, crisp, and quiet is ideal. There are a few other good microphones in this price range such as the CAD E-100 S or even the legendary Shure SM 7B, but honestly, the Rode is sublime, so I would look no further. It is also very cheap coming in at under $300 and usually comes in a kit with a pop shield and a few other helpful bits.
#3 Audio Interface For Voice Over
The audio interface is how you convert the analog signal of your microphone into computer language. It is a very important part of the setup and is the cornerstone of your home setup. You want an audio interface with great quality and clean pre-amps/converters, that is also easy to use.
My recommendation – Focusrite Scarlett 2i2
I personally use this interface and love it. It’s cheap, easy to use and very clean. This is a staple amongst home studios and is probably the most widely used interface for new voice over artists. It’s lightweight and very portable, so it’s also great for taking on the road. It offers high-performance converters, which enable you to record at up to 24-bit/192kHz. The preamps are also very clean and are third-generation Scarlett mic preamps. Focusrite has a great reputation for preamps and interfaces, so it’s a solid brand you can trust.
#4 Best Headphones For a Voice Over Studio
There are tonnes of great headphone options out there and there are lots of choices at all different price ranges. But I wanted to continue to share my recommendations based on what I use, and have worked with the professional environments.
My advice is to invest in a solid pair of Beyerdynamic DT 770s. These are industry standard headphones that I have always used. You will find them in top studios and yet they don’t break the bank. They are super comfortable and I strongly recommend investing in a pair. If you are keen to do more research take a look at the Sennheiser HD280 Pro, Sony MDR 7506 and Audio Technica ATH-R70x.
#5 DAW (Digital Work Station) for Voice Over
Your digital workstation is simply the software that you use to record the audio. At the end of the day the DAW doesn’t really affect the audio quality, it’s more just for editing, and manipulating the audio. So for me, the priority is the ease of use. The industry leader is Pro Tools, this is the software used in most top recording studios, but though I am a loyal Pro Tools user myself, it is serious overkill for even a professional voice artist. This is simply because voice-over doesn’t require a lot of editing and so my recommendation is to look at a simple program like Reaper or Twisted Wave. Both are super cheap and easy to use.
However, here are some options in order of price:
A. Audacity. This is always the first choice for new voice artists, but I personally am not a fan. Look, it will work and can be totally fine, but I think it’s ugly and just not the best option. For a small price, you can jump up to one of the programs I list below.
B. Reaper or Twisted Wave. These programs are built with voice over in mind. They are super easy to use and give you everything you need for producing high-quality voice-over recordings. Reaper and Twisted Wave are used by many big VO artists. One of my best friends who is one of the top VOs in the country uses Twisted Wave.
C. Adobe Audition. Adobe is one of the most trusted brands in creative software, and Adobe Audition is a great program. If you are already in the Adobe eco system this would be my recommendation. User-friendly, very reliable and a powerful tool for audio editing. This is definitely a professional option.
D. Logic. You don’t hear too much about logic in the VO industry, but it’s a fantastic DAW. The reason I list it here is that many actors who maybe have a Mac and do music editing may already have this program. If you have already paid for it, and know how to work the system, I would stick with it. Powerful software and definitely more than good enough for VO. Though I wouldn’t purchase this if you are just starting out.
E. Pro Tools. As I mentioned above, Pro Tools is the most well-known editing software out there. But for a newbie, it’s a bit of a nightmare. It’s complicated, expensive and just unnecessary. I would only go down this route if you have a real interest in the audio editing side of things and want to really become a master, but otherwise just an unnecessary cost.
#6 Acoustic Treatment For Your Voice Over Studio
Acoustic treatment for voice over is pretty simple: deaden the sound. You want to create a space that is as dead as possible. We are talking small spaces, covered in soft fabric. This is why you see many home studio setups with carpets on the walls, dense curtains and other fabrics. You want to get away from hard surfaces and try to eradicate any echo or reverb.
Soundproofing is the other aspect of your setup. This is actually more difficult, especially if you live in a noisy location. Planes, car noise, babies! They are all out to get us! The easiest way to avoid this is to choose a room or area in your house that is naturally quiet, rather than spending thousands on soundproofing. Avoid setting up your studio next to a road, or anywhere that gets background noise. There is no audio plugin that can realistically remove cars or planes. Always solve this when recording!
I would pick a place that is quiet first, and then work on deadening the sound as much as possible. You could look at some acoustic panels or check out some ideas for great affordable acoustic treatment (it’s a lot of fun). I personally recommend checking out moving mats. These are dense mats that are used when moving house. You can pick up a stack really cheap and use them to cover walls or create curtains for your studio.
#7 Other gear
You are starting to look pretty good but you will need a few final pieces:
A) Mic stand. Don’t blow the budget here but aim for something that is nice and sturdy, we don’t want the microphone moving around too much.
B) Shock mount. This is a simple device that cradles the microphone and stops the shocks from you stamping around.
C) Pop shield. I would recommend a basic pop shield, especially if you are new to VO. This is basically a light piece of fabric that is placed in front of the microphone and helps mitigate the pops on words plosive sounds like p and b.
Professional Voice Over Studio Setup
Ok, so want to take your work to the next level, well here are my suggestions. The first area you would improve would be the microphone. There are a few options:
#1 Professional Microphone for Voice Over
There are a lot of options with professional microphones, but after years of working in the VO industry there are really just two options I recommend:
Sennheiser 416 (The Ultimate Voice Over Microphone)
The Sennheiser 416 is THE voice-over microphone. This is used in almost every voice over studio and is an absolute workhorse. If you are getting really serious and want to get the industry-standard microphone, you are in business. It’s actually a shotgun microphone traditionally used on film sets, which makes it incredibly directional and precise.
This is the microphone I use and it is awesome. It is probably overkill for most home setups unless you are set on making this your number one hustle. It sounds great on almost all voices and is really the gold standard for voice over.
Neumann TLM 103 or Neumann U 87
Ok, I said there were two options, but these are like siblings. Neumann is the best microphone brand in the world. I know, huge statement, but these are just awesome. These are beautifully made, professional microphones that are perfect for VO. The two major candidates in the Neumann world are the TLM 103 and the U87. U87 is the gold standard and comes in at nearly double the price of the 103, but if you are looking to have a top of the line microphone it’s incredible.
I actually think the Neumann microphones are a little more forgiving than the Sennheiser 416 and work better on all voices. I guess you want to know what I would do? Well I would probably go with the Sennheiser just because of it’s name; if you list it as the microphone you use to clients, it will make you look more professional.
Professional Voice Over Audio interface options
#1 Universal Audio Apollo Twin
At the next level of audio interfaces, the competition gets fierce. There are a number of great brands including Audient, RME and Antelope, but Universal Audio is my top pick and I would say the most common in advanced home studios and small professional studios. This interface just offers a step up in terms of audio quality and pre-amps compared to the Focusrite. It also allows for more functionality and different options to make your studio more adaptable.
Universal Audio is a terrific brand. I would say this interface is the standard of the project studio. Both for VO and music production. It’s an incredibly powerful machine and it’s also just sexy. Check out the Universal Audio Interface.
#2 Apogee Duet
This is the audio interface that I use, and I love it. It’s super clean, easy to use, and just has a fantastic sound. The only downside is most of the inputs come out of the core unit like an octopus and it’s just a bit messy. I think for around the same price I probably in hindsight would have gone the Universal Audio, but it’s still a great unit.
But though these are both great options, the audio difference would be imperceivable to most ears, and many of the top voice actors out there look no further than the Focusrite or other simple interfaces.
Acoustic Treatment
You might be thinking the professional recommendations above are starting to break the bank, well acoustic treatment is where the price is basically limitless. Though you can get away with rugs, carpets and all sorts of makeshift treatment, professional audio treatment can get out of hand. But it really does help! If you are working from home at a very high level, investing in a great space will in many ways be more helpful than a new microphone. The Rode NT1 in a good room, would be better than the U87 in an echoey bad space, so it matters. One option for the serious home studio enthusiast is getting a custom built booth. This is an isolated room for recording audio. These can fetch into the $1000s, but are completely soundproof and acoustically treated for near-perfect audio quality.
Extreme Upgrades: Preamps, Compressors and Channel Strips
So the final step if you wanted to get insane is audio processing such as compressors, EQ and other audio gear. To put it simply, this is overkill. I work with many of the top VOs in the country who are earning massive bucks in the industry, and almost no one uses these. Unless you are an audio engineer they are actually more likely to ruin your recordings than add anything. The other option is getting what is known as a channel strip which combines generally a preamp, EQ and Compression. I you are looking at any of this external gear here are some recommendations:
Conclusion
I have worked in the voice-over industry for many years, and have helped countless actors get set up with their home studios. Hopefully, you can feel confident with these recommendations but definitely do your own research. There are some great resources from blogs to Youtube channels, and who doesn’t enjoy learning about gear! I wish you all the best and if you have any specific questions just let me know and I will do my best to help out.
Leave a Reply